User Tools
Sidebar
Table of Contents
Snake Game Tutorial With Pygame
Setting Up a Pygame Surface Object
For this project, only a few things are needed: a basic knowledge of python, some pygame basics, plotting pixels, and drawing lines in python. To start up a pygame window all you need is a pygame surface object, a main game loop, and loop to get pygame events.
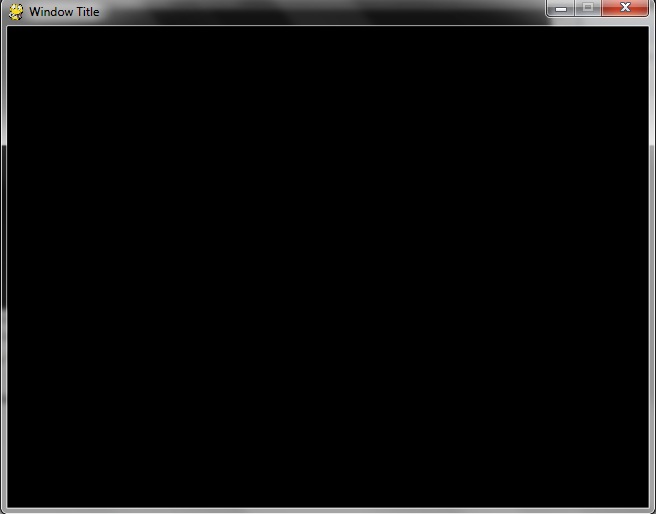
The above code demonstrates how to open up a simple but fairly useless pygame window. The lines:
screen = pygame.display.set_mode((640, 480))
pygame.display.set_caption("Window Title")
initialize a pygame object called screen. This opens a window at 640 X 400 pixels. The next line sets title for the window as “Window Title”. The next few lines are fairly straight forward except one.
clock = pygame.time.Clock()
This line creates another object that helps keep track of time. This object will be used later in the program to set the frame rate. This becomes very useful when working with objects that will be moving around the screen. With this you can either speed up or slow down movement.
Inside the main game loop we make a call to the screen objects fill function to make the background black. Then we use a for loop to get pygame events which specifically is looking for the QUIT event which will exit the main loop and terminate the program.
Plotting Pixels to the Screen
Next on the list is plotting pixels to the screen. What we're going to need for this is an x and y position to drop the pixel and a color for the pixel. The most interesting way we can do this is to use some random x and y positions. We start by doing everything we did before, with a few tiny additions.
PIXEL_COLOR = (0, 255, 0)
This little bit is just a place for us to store the RGB value for the color red. This will get used when we make the function call to drop the pixel. Which is where this comes in.
x = random.randint(0, 640)
y = random.randint(0, 480)
screen.set_at((x, y), PIXEL_COLOR)
First, we're setting the x and y positions. Since the screen is 640 X 480, we set those as the max values for our x and y. The last line actually plots the pixel. The function takes two parameters: the x and y position followed by the color of the pixel. So, for every iteration of the main loop we plot a new pixel at a random position on the screen.
Drawing Lines on the Screen
The next big ingredient for our game is drawing lines. Drawing lines is really no different than pixels save one thing, an extra set of x and y coordinates. We need two. One for the start of our line and one for the end of our line.
pygame.draw.line(screen, LINE_COLOR, (0, 0), (640, 480)
This is the only new item this time around. And like I mentioned before, it's almost identical to how we plotted pixels save for extra set of x and y coordinates. Although this time around this function is not a member function of our screen object. Here we need to pass the screen object as a parameter to the draw.line function. The draw.line function takes the following parameters: a pygame surface object, an RGB value, start x/y coordinates, and stop x/y coordinates. Our line stretches from (0, 0), the top left corner to (640, 480), the bottom right corner.
Keyboard events
Next on the list is keyboard events. How to use em and what to do with them. In pygame keyboard presses are event objects. They're not hard to use. All that has to be done is checking the event type for a key press.
elif event.type == pygame.KEYDOWN:
			if event.key == pygame.K_DOWN:
				if x == 3:
					x = 0
				screen.fill(LINE_COLORS[x])
				x += 1
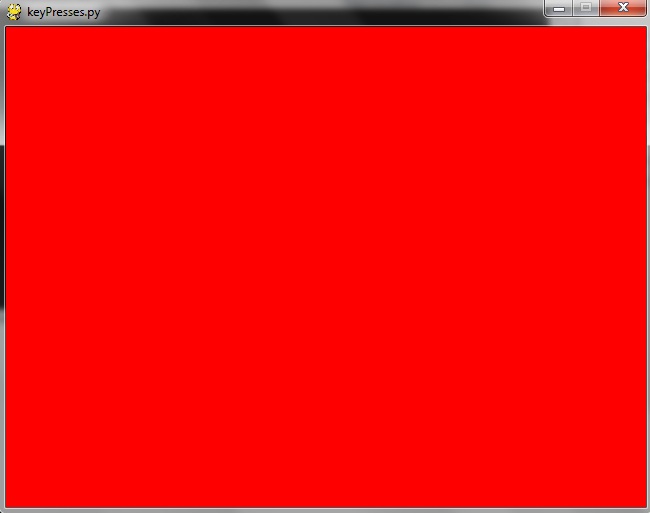
This time around, this is the only part of the program we need to be concerned with. If the quit event is not found it then checks for a keypress and then looks for the down arrow key. It checks the subscript to make sure it's not greater than 3, if it is, it get's reset to 0. So when you press the down buttons it cycles through the LINE_COLORS[] array, changing the background color with every press of the down key.
Worm game
Ahhhh, for the moment all have been waiting for. The pinnacle of this journey is here. The worm game. This will take everything we've done so far opening a window, drawing pixels, drawing lines, and handling keyboard events to make a small functional game.
Food Class
The short and sweet version of this is the following. We're going to need to make two classes: a food class and a worm class. Both of these will be drawn by plotting the individual pixels to create the object. Think of the food almost like doing a 2d array, a grid. We'll use a nested for loop to plot a range of pixels starting from a random position going 5 pixels to the right and 5 pixels down. The food class takes the following arguments: pygame surface object, the width of the window, and the height of the window. It has the following the attributes: surface, color, and start x, and start y. The surface is the pygame surface object, the color is set to red, and the start x and y are randomized from 0 to the size of the window.
class food:
    """Initialize food object"""
    def __init__(self, surface, sWidth, sHeight):
        self.surface = surface              #pygame surface
        self.color = (255, 0, 0)            #food's color: Red
        self.x = random.randint(0, sWidth)  #start x pos
        self.y = random.randint(0, sHeight) #start y pos

    def drop(self):
        """Prints a food item to the screen"""
        X_MAX = self.x + 5      #Max width of the food item
        Y_MAX = self.y + 5      #Max height of the food item

        #Draws a 5 X 5 food item to the screen
        for i in range (self.x, X_MAX):
            for j in range (self.y, Y_MAX):
                self.surface.set_at((i, j), self.color)
The drop() function plots the food object to the screen. We set a X_MAX and X_Y to the object's x + 5 and y + 5. This is where we put in our nested for loop to plot the pixels using our pixel plotting function. We do this just like we plotted pixels before, the only difference this time is that we're using a for loop to plot multiple pixels. We start at a random position, incrementing by one pixel every iteration until we reach X_MAX or Y_MAX of the color red. We also have a getColor() function. This just returns the RGB value of the worm's color. I prefer this over directly accessing the member variable.
Worm Class
With the generics of the food out of the way we can move onto something a bit more complicated. Unlike the food, the worm needs to be able to move and understand keyboard events for turning. It needs to know its direction, to have a certain length, and whether or not the worm has hit something. We also need to know what the worm is hitting, a food object or an obstacle of some sort. Also, we want to increase the worm's length every time it eats a piece of food to add a little challenge to the game.
So, our worm is going to have the following functions.
- __init__(self, surface, x, y) - Initializes our member variables
- keyEvent(self, event) - handles the keyboard events
- move(self) - moves the worm
- draw(self) - initially draws the worm
- crashCheck(self) - checks to see if the worm has crasheed
- getX(self) - returns the current x position of the first pixel of the worm
- getY(self) - returns the current y position of the first pixel of the worm
- increaseLength(self) - increases the length of the worm
We also have the following member variables:
        self.surface = surface  #pygame surface
        self.x = x              #worm head x pos
        self.y = y              #worm head y pos
        self.length = 200       #worm length
        self.dirX = 1           #worm x direction
        self.dirY = 0           #worm y direction
        self.body = []          #x, y pos for worm body pixels
        self.crashed = False    #if true, exits the main game loop
Most of those should be fairly self explanatory except for dirX, dirY, and body. With the dirX, if you increase it, the x position increase, moving it to the right of the screen. If you decrease that value, it moves to the left of the screen. dirY works in the same but instead of left and right we're looking at up and down. These will be used in conjunction with our keyboard events. The body array will contain every x, y position of the worm. Also, remember that since we're constantly adding a pixel to the worm every frame to make it “move”, we will also need to delete one so that it's not drawing one continuous line across the screen.
Key Event Function
def keyEvent(self, event):
        """Handles keyboard events for movement"""

        if event.key == pygame.K_UP and self.dirY != 1:
            self.dirX = 0
            self.dirY = -1
        elif event.key == pygame.K_DOWN and self.dirY != -1:
            self.dirX = 0
            self.dirY = 1
        elif event.key == pygame.K_LEFT and self.dirX != 1:
            self.dirX = -1
            self.dirY = 0
        elif event.key == pygame.K_RIGHT and self.dirX != -1:
            self.dirX = 1
            self.dirY = 0
Here we're handling our keyboard events. We're checking to see what button is pressed and what direction the worm is heading in. If we're heading down we don't want to accidentally try to move up. This will cause the worm to crash into itself and then game over. Since we're only moving in 4 directions either the x or the y will always be 0. 1 being either right or down and -1 being either left or up.
Move Function
def move(self):
        """Moves the worm"""

        self.x += self.dirX #increment worm's x direction
        self.y += self.dirY #increment worm's y direction

        #Checks to see if the worm is in contact with anything other than
        #a black (background) or red (food) pixel, and if so, self.crashed
        #is set to true

        r, g, b, a = self.surface.get_at((self.x, self.y))

        if (r, g, b) == (0, 0, 0) or (r, g, b) == (255, 0, 0):
            self.crashed = False
        else:
            self.crashed = True

        self.body.insert(0, (self.x, self.y))

        #Compares the number of the worm's body pixels to the length. If
        #true, a pixel is removed from the worm.
        if len(self.body) > self.length:
            self.body.pop()
We start moving the word by incrementing its x position by its x direction and its y position by its y direction. The next thing we do is return the RGB of the worm's current position. Nevermind the a value as it isn't really important. Then we compare that RGB value to see if it's either black or red. If it's neither of these, the worm crashes and the main loop ends. After this we add another body at the beginning and delete one at the back of the worm.
Draw Function
def draw(self):
        """Draw the worm"""

        for x, y in self.body:
            self.surface.set_at((x, y), (255, 255, 255))
Now we draw the worm. Here we're just looping through the body[] array and plotting a pixel in every x, y position contained in that array.
Increase Length Function
def increaseLength(self):
        """increase worm length"""
        self.length += 4
This function is used to increase the worm's length by 4 more pixels. We'll call this whenever the worm eats a piece of food.
Other Member Functions
    def crashCheck(self):
        """Checks if the worm has crashed into an object)"""
        return self.crashed

    def getX(self):
        """Returns worms x pos"""
        return self.x

    def getY(self):
        """return worms y position"""
        return self.y
These functions will are only to return values. This can also be done by accessing the variables directly. If you'd like to access the variables directly, that's entirely up to you.
Other Functions
Here we have our other function(a)s.
- drawObsctacles(screen, width, height)
- checkEatenFood(r, g, b, w, chomp, foodColor)
- checkForCrash(w, running, crash, width, height)
- getEvents(running, w)
Draw Obstacles Function
def drawObstacles(screen, width, height):
    GREEN = (0, 255, 0)
    startX = 100
    startY = 50
    stopX = 100
    stopY = 150

    pygame.draw.line(screen, GREEN, (startX, startY), (stopX, stopY))
    pygame.draw.line(screen, GREEN, (startX, startY + 200), (stopX, stopY + 200))
    pygame.draw.line(screen, GREEN, (startX + 200, startY), (stopX + 200, stopY))
    pygame.draw.line(screen, GREEN, (startX + 200, startY + 200), (stopX + 200, stopY + 200))
    pygame.draw.line(screen, GREEN, (startX + 400, startY), (stopX + 400, + stopY))
    pygame.draw.line(screen, GREEN, (startX + 400, startY + 200), (stopX + 400, stopY + 200))
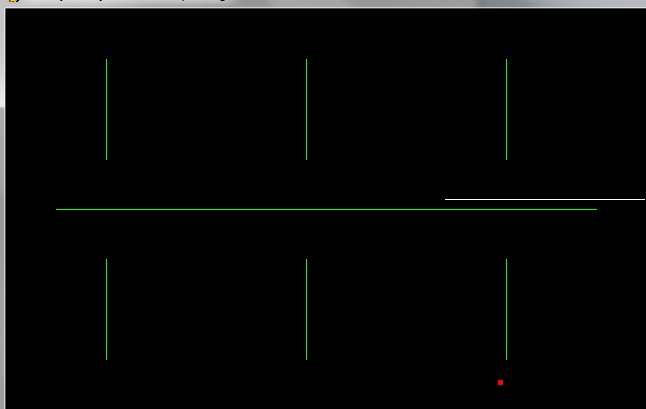
    pygame.draw.line(screen, GREEN, (startX - 50, startY + 150), (stopX + 490, stopY + 50))
This is pretty cut and dry. We're just drawing lines to the screen, of color green, to positions relative to startX, startY.
Check Eaten Food Function
def checkEatenFood(r, g, b, w, chomp, foodColor):
    foodEaten = False

    if (r, g, b) == foodColor:
       w.increaseLength()
       chomp.play()
       foodEaten = True

    return foodEaten
Here we're just checking the RGB value of the worm's current position and if it's the color of the food we call the worm's increaseLength() function, play the chomp sound, and set foodEaten to true and return it.
Check for Crash Function
def checkForCrash(w, running, crash, width, height):
    if w.crashCheck():
        print("Crash!")
        crash.play()
        running = False
    elif w.getX() <= 0:
        print("Crash!")
        crash.play()
        running = False
    elif w.getX() >= width - 1:
        print("Crash!")
        crash.play()
        running = False
    elif w.getY() <= 0:
        print("Crash!")
        crash.play()
        running = False
    elif w.getY() >= height - 1:
        print("Crash!")
        crash.play()
        running = False
    return running
Again, there's not a lot going on here. We're simply making sure that the worm hasn't crashed into an obstacle or going off the screen. If either of these occurs “Crash!” is printed to the termial, plays a sound, and sets running to false to the main game loop will be exited.
Get Events Function
def getEvents(running, w):
    for event in pygame.event.get():
        if event.type == pygame.QUIT:
            running = False
        elif event.type == pygame.KEYDOWN:
            w.keyEvent(event)
    return running
We're still only building on previous things we've learned. This function simply handles the keyboard events. We look for the keydown event and send that event to the worms keyEvent() function and the appropriate action is taken from there.
Main Game Loop
Housekeeping Tasks
#Initialize variables
width = 640						#screen width
height = 400						#screen height
screen = pygame.display.set_mode((width, height))	#pygame surface
pygame.display.set_caption("Wormy wormy stuff")		#window title
clock = pygame.time.Clock()				#pygame clock
FPS = 90						#Game speed
running = True						#keeps main loop running
SCREEN_COLOR = (0, 0, 0)				#black screen color
itemsEaten = 0						#berries eaten by worm

#Initialize sounds
pygame.mixer.init()
chomp = pygame.mixer.Sound("atari.wav")
crash = pygame.mixer.Sound("crash.wav")

#Initialize worm and food objects w and f
w = worm(screen, int(width/2), int(height/2) - 10)
f = food(screen, width, height)
We've seen all of this before except for the the sound initialization. Initialize the mixer with the call to pygame.mixer.init(). Then we set two objects chomp and crash. When we want those to play we make calls to chomp.play() and crash.play() respectively.
Game Loop
while running:
    screen.fill(SCREEN_COLOR)

    drawObstacles(screen, width, height)	#Draws green line obstacles

    f.drop()					#Drops a food item
    foodColor = f.getColor()			#stores food color
    w.draw()					#Draws the worm to the screen
    w.move()					#Let's the player move the worm

    #Gets the color of the worm's current x and y position on the screen
    i = w.getX()
    j = w.getY()
    r, g, b, a = w.surface.get_at((i, j))

    #Checks to see if the worm's current position color matches that
    #of the dropped food item. If yes, the number of eaten items is
    #incremented by 1 and a new food item is dropped
    if checkEatenFood(r, g, b, w, chomp, foodColor):
            f = food(screen, width, height)
            itemsEaten += 1

    #Checks to see if the worm has crashed into something and sets
    #running accordingly.
    running = checkForCrash(w, running, crash, width, height)

    #Checks for events
    running = getEvents(running, w)

    pygame.display.flip()	#Updates the display
    clock.tick(FPS)		#Sets the game to run at X FPS
print("You ate", itemsEaten, "food item(s).")
In the main game loop we start off by filling the background and then draw our obstacles. Then we drop a food object and get its color followed by drawing/moving the worm. We then obtain the x, y position of the worm's head and check the color at that position. We make a call to checkEatenFood() and check it's return value. If the food has been eaten we drop a new food item and increase itemsEaten by 1. Next we make our call to checkForCrash() and getEvents(). Then we update our display and set our frames per second.
Our final line simply outputs the number of items the worm has eaten. A nifty way to try to keep beating your score. And this is what your game should look like.


