Sidebar
Table of Contents
~~DISCUSSION|BLENDER~~
Blender's Basic Commands
| Command | What it does |
|---|---|
| right click object | selects that object |
| i | Insert key |
| g | Grabs an object to move |
| r | Rotates an object |
| x | Delete selected object |
| s | Changes Size of object |
| shift + d | Duplicate object |
| tab | Switches between object and edit mode |
| a (in edit mode) | deselects all verticies |
| shift right click | can select multiple verticies or objects |
| space | can use the space key to add a new mesh (object) |
Blenders Game Engine
ok so im going to breifly try to explain how to use the game engine to be able to use the keyboard to make an object move
- first off open up blender
- next you can delete the default cube by hitting x (only do this if u wish to add another object to manipulate)
- in the buttons window (the window on the bottom) their are a few buttons the one were looking
for looks like pacman and when you hover over it it says “logic”
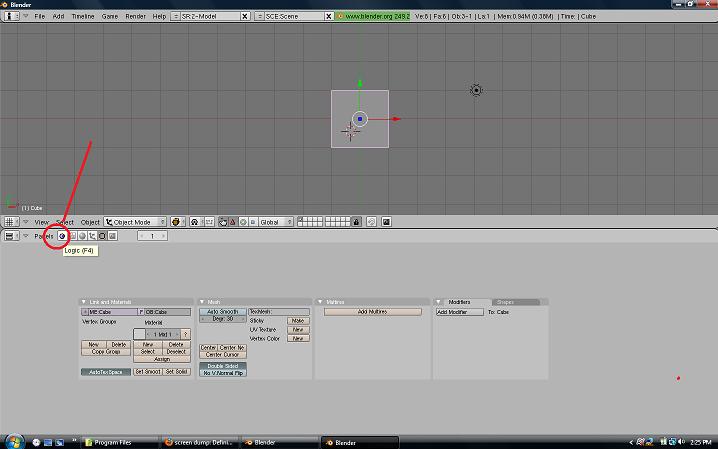
- after selecting the logic button a few tabs pop up “Sensors” “Controllers” “Actuators”
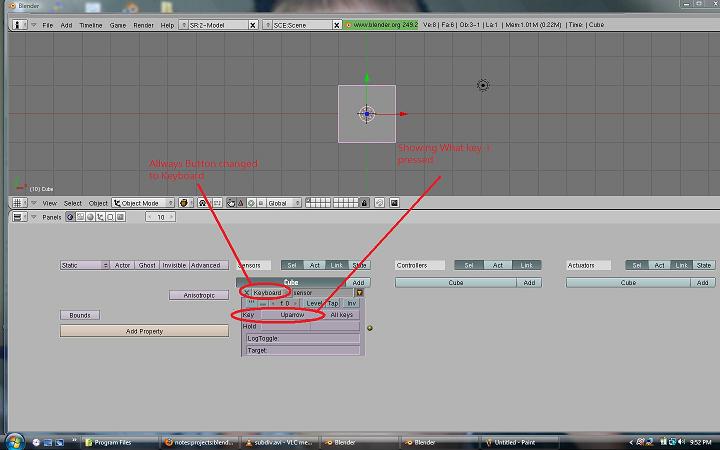
- “Sensors” tab - You should see the object name you have selected and then add right by it. Click the add button their should be a bar that says “allways” click that and select “keyboard” this will use the input from the keyboard.. more options should pop up including one that says “key”. click in the blank space to the right of that and then hit the key u want to use or attach a movement too.
- after adding the key to use you can add the “controller” just hit add new. and thats all we have to do their.
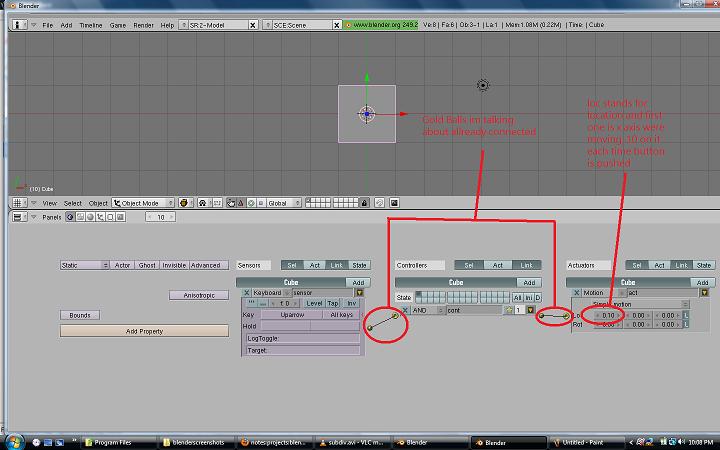
- ok if you noticed when you added these their are gold balls on the outside of the pulldowns that came up when you hit add. if you click on the gold ball and drag you should see a black line.. these allow you to connect the “sensors” to the “control” so go ahead and click the gold ball on the right of the new sensor we just made and drag it to the gold ball looking thing on the left of the “controll” tab.. this will connect the events (you will have to do this again after we add the “Actuator” so you would click the ball on the right of the control and drag it to the left gold ball on the actuator.)
- “Actuator” this basically controls the movment of our object based on our control key.. simple motion is the easiest to work with so we will start their.. below that you will see a tab that says Loc with 3 blank spots to the right left these are the x,y,z cordinents and how much you want your object to move each time you press the “sensor” key you added.. you can set them to whatever you like i set just the x to .10 (again you must connect the gold balls if you havent done this..)
- After all that is done your pretty much set to go for this simple demonstration.. so hit the p key (this starts the game engine)
- after starting the game engine you can then hit the key you selected in the “sensor” tab and watch your object move!!


note screenshots will be added to make the demonstration easier as soon as i figure out how to load them up!)
Blender Particle's
ok so ive been watching alot of the super3boy tutorials online as well as a few on the actual blender site.. some good stuff on both check em out but anyway this whole particle thing looked kinda neat so i figured i would write a little about it at least what i have an understanding of at this point.
also check the blender python scripts page soon for adding/editing particles in a script its alot easier to understand what some of the things do in the blender api after using them so i would suggest going through this first.
- ok to start open blender
- once open delete the default cube by hitting x
- hit spacebar scroll to add new mesh “plane”
- ok so now we have a plane on the screen you might wanna change to side view to get a good look at what is going to happen
- select the objects button its the button with 3 arrows on it
- select the particles button
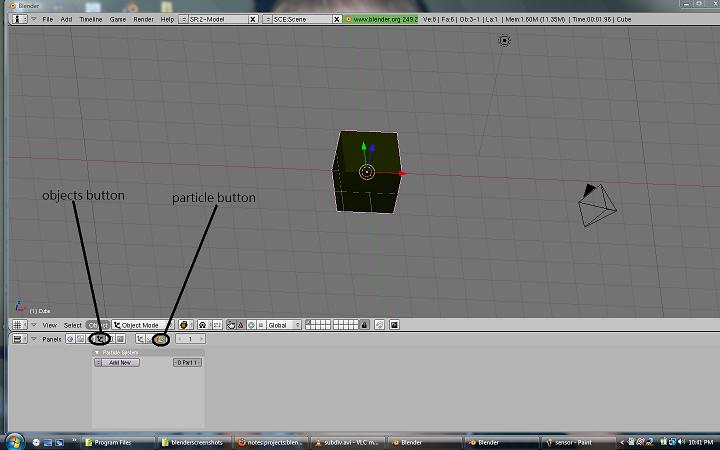
- next hit add new! and get all the goodies
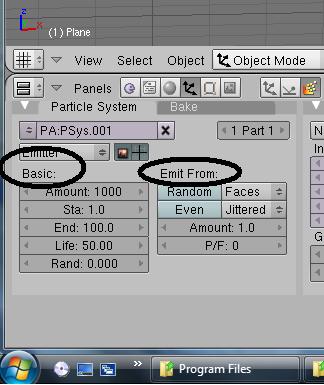
- ok to start right under where u clicked add there is a section called basic this controls amount of particles the frame they start and stop in their lifespan and random lifespan edit to your own liking
- to the right of that we have a section called “Emit From” this is where we can pick where the particles come from and how they are distributed
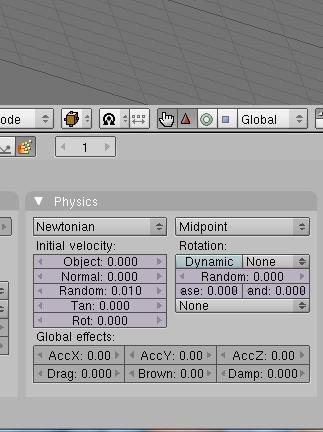
- Next we have the Physics Sections this is where i get a little shaky but ill give it my best go..
- at the top you have a pulldown box that says newtonian this is the type of pyhsics being used you can change it to whatever i know little about them allthough i have played with them all and they all have their unique qualitys..
- below that we have an object value and as of now im not sure what that does at all.. ive played with it a bit but havent seen any diffrences the definition it gives while hovering is “Let the object give the particle its starting speed”
- Normal - ok so if you adjust this the particles will shoot straight out of the object at the given velocity
- Random - this will make the particles go in random directions the higher the number the more random
- Tan - “Let the surface tangent give the particle a starting speed” not really sure about but this will shoot out the particles at angles from what i can see..
- Rot - rotates the tangent of the object.. i noticed when this was all the way up the value of Tan is reversed so like if you had a positive tangent and went right it would change and go left more if rot was increased.
- Global Effects - from what i can tell is this is kinda like a wind type effect on the particles it creates a wind like velocity so if the x was increased it would effect the velocity of the particles on the x axis making it move more to the left or right..
- as far as the rest of the buttons go im not really sure as to what they do at this moment
- to the right of the physics tab u have the visualization tab im not going to load a picture its pretty self explanatory you can choose the size of and look of the particles.. sooner or later im going to have to look at loading up or uvmapping an image to them or some sort of colorization
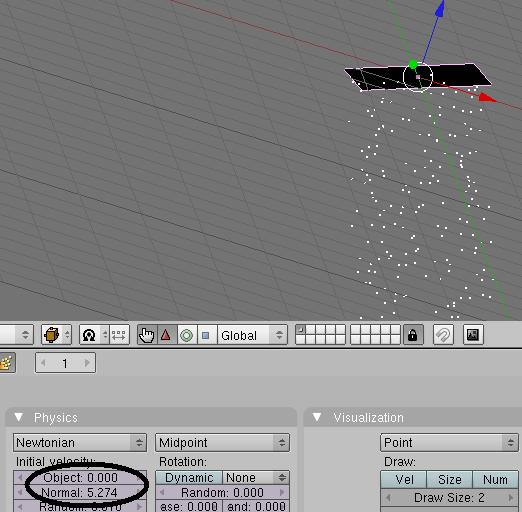
- so to complete this tutorial lets just crank the normal button up in the physics tab
- hit alt+a to preview the animation
- you should see your plain start shooting out particles like this (NOTE MY PLANE IS UPSIDE DOWN SO DONT BE ALARMED IF YOUR PARTICLES ARE GOING A DIFFRENT WAY!)


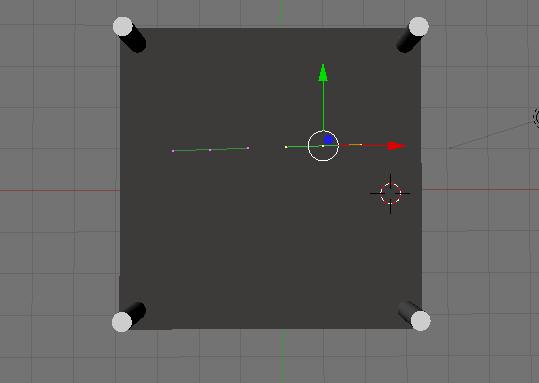
Make A Boxing Ring.. Show how to use curves and add extra stuff to meshes
ok so the point of this really is to show how to use the bezier curve and show how it can be beneficial while creating an animation.. the animation part will prolly come a bit later but ill explain the benefits of having a curve instead of an object.
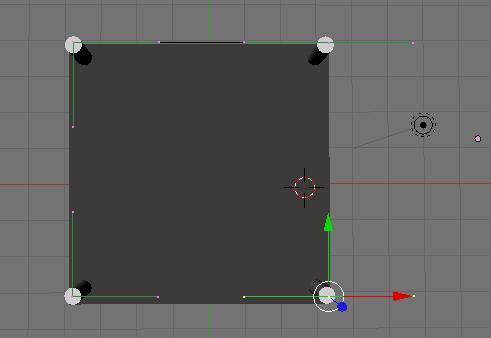
- Ok so lets boot up blender
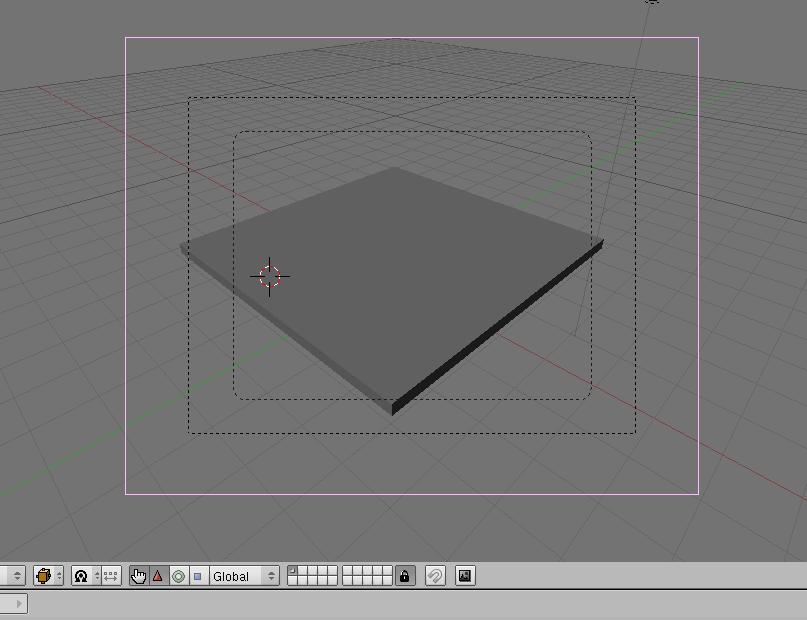
- for this we can just use the default cube to make the base of our ring.. at least thats how i did it im sure their are other ways be creative.
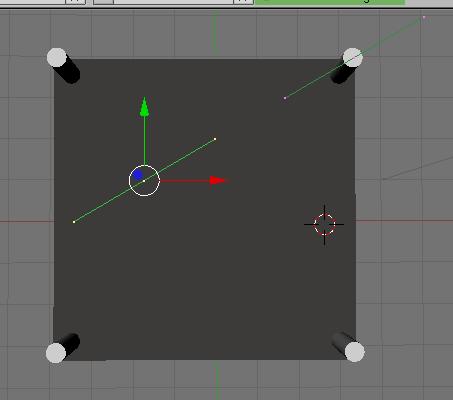
- so i started by changing my veiw a little bit so i could see more faces of the cube
- hit the s key (Size Key) and then hit Z. this will only change the size of the object on the z axis that way we can make the cube smaller only on the z axis so it looks more like the base of a boxing ring..
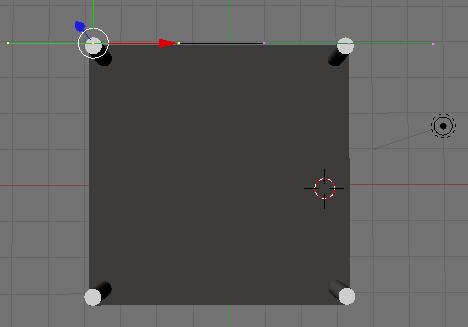
- the next thing i usually do after that is change to the camera view you can do this by selecting zero on the numpad or the other method just change tabs in bottom left of the window
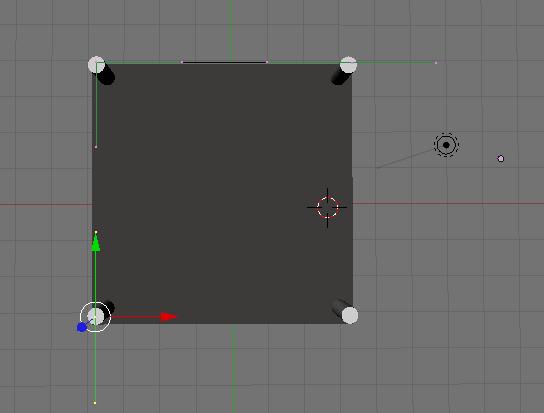
- now that were in camera view we can see that our ring is probley a bit smaller than we wish it to be so we need to size it up a bit. to do this u can again hit s (Size Key) and then x or y to move it on just one axis. fiddle around with it untill you get somthing that looks somewhat like what i got here.
- So now we have our base.. lets add some color and a texture to it now.. (This Step Is Optional Just Showing How To Change Color And Add Texture To Mesh)
- first things first we need to get into the Shading Options.. and the Materials options.
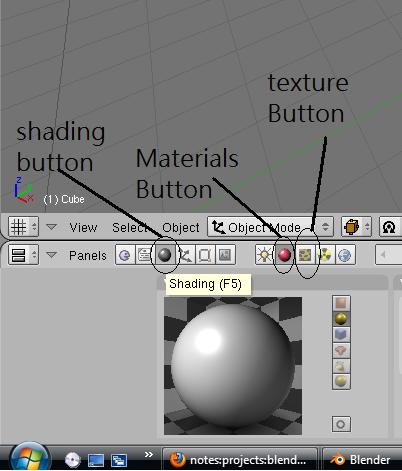
- so lets click the shading button and then click on the materials button now we are able to edit a few things about our mesh so lets just change the color.
- now that were in the materials tab a few new options pop up the one were looking for to change color looks like this.
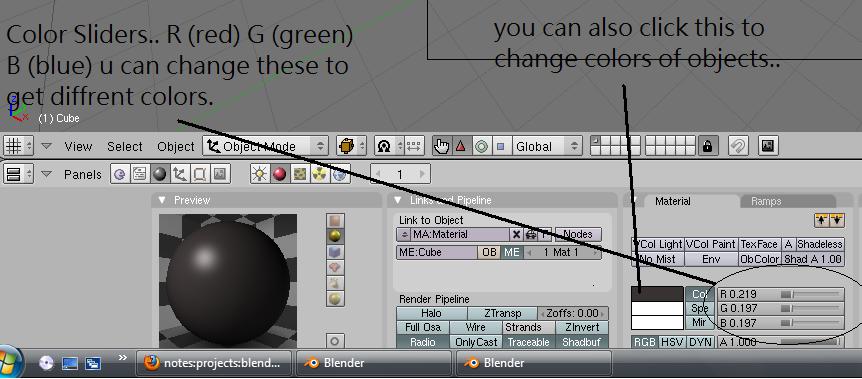
- notice that when you change the color the object all the way to the left in the preview window changes color! this is what your object will look like after your changes
- ok so now that we have a solid color lets add a texture to our mesh.
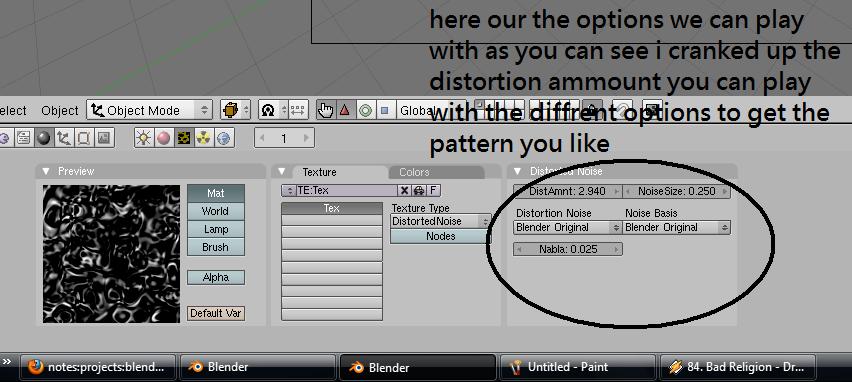
- so were going to have to click on the texture button and then where it says “Texture Type” underneath that their is a pull down box that has diffrent types of preloaded textures we can use..
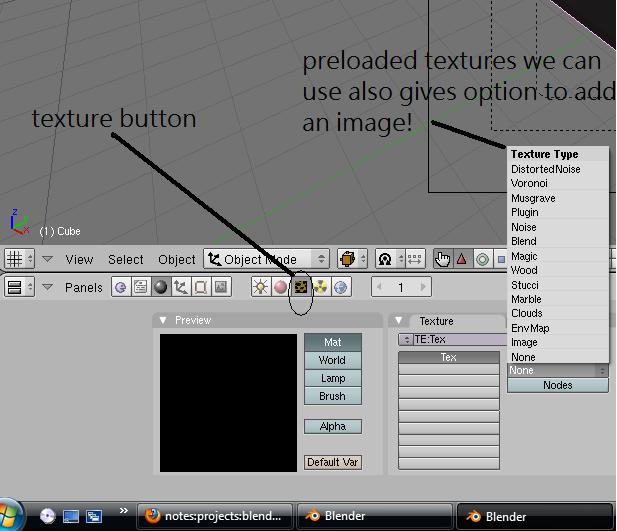
- well lets pick our texture! (i added an image to mine but ill show you a basic texture really fast)
- so for this tutorial lets choose distorted noise the option all the way at the top..
- notice now you have another preview screen this shows you the patter of your texture this can be changed around to your preference.
- ok so now we have our texture up lets click back to the materials button.. (button to the left of textures button see above picture)
- ok so now look at the preview of the object you can see that our texture has been applied but wtf.. why is the other color pink?
- to answer that i would think its the default color loaded to a texture as it seems to be pink all the textures i have checked out
- but dont sweat it because we can change that nasty pink color!!
- here we go in the materials tab your going to see options like the ones below..
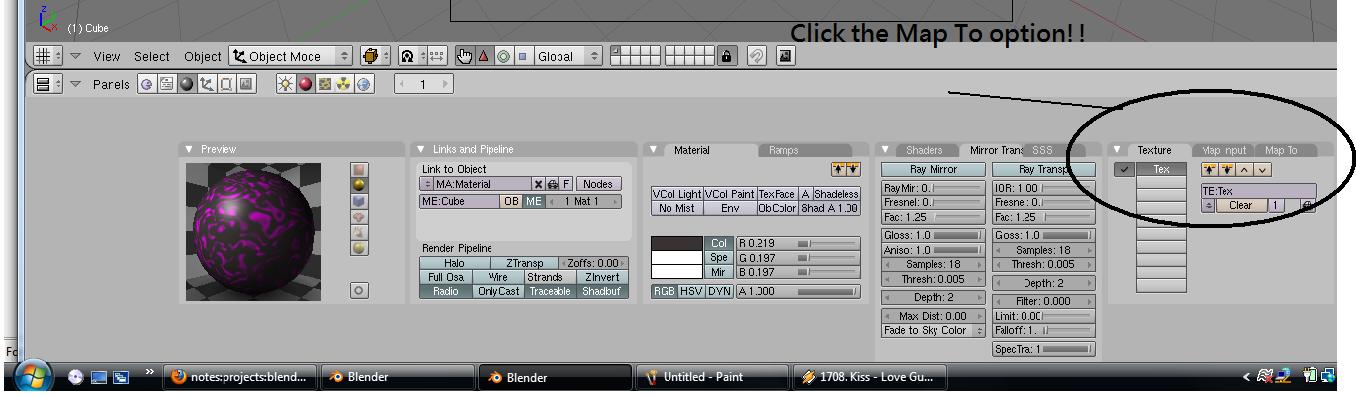
- as the picture says click the map to option.. and Alas their is that nasty pink color so lets go ahead and change that to something we wish to see!
- you can click on the R (red) G (green) B (blue) sliders or just plainly click on the bar that shows the color either way will change your secondary color to your texture
- now that we have our texture and the colors we wish to see on it lets move on with the boxing ring!
- so get to a good view that's suitable for you i usually start off with “Top View” (7 on the numberpad)
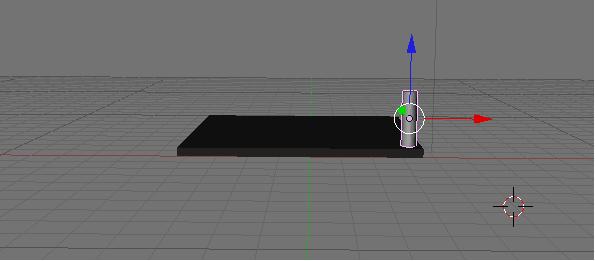
- next were going to have to add a cylinder to the mix to create our first corner pole again your going to have to size this to resemble a corner pole ive already gone over sizing objects and how to manipulate them on just one axis at a time so you should be able to figure this part out for yourself!
- now that you have your corner pole at the right size now we have to place it on our base..
- this is pretty easy from top view i just place it where i want it above the object and then change to front view and grab it and hit z to just move it on the z axis and drag it down to where its touching the base of our ring
- so instead of making more cylinders and scaling them its easier just to hit “Shift + d” this creates a duplicate of the object.
- before moving the object lets hit the x button this will move your duplicate object along the x axis now place it in the corner
- so now we have two corner poles we need two more
- a little trick i learned to make this easy is right now you have one corner pole selected lets hold down shift and then right click on the other corner pole we have now both poles are selected
- now that both are selected lets again hit “Shift + d” and this time were going to hit y to move them on the y axis this will create a duplicate of both poles and we can drag them to the empty corrners.
- NOTE you can edit the colors and textures of the poles the same way you did the original plane just select it and go!
- so now we get to the fun part adding the curve!
- ok so make sure your in object mode then click “Space > ADD > Curve > Bezier Curve”
- after the curve pops up click over to edit mode the curve will change shape
- in edit mode select the curve and hit the “v” key this will straigten the curve up and leave you with 6 verticies on your curve
- so lets select the verticie that is one in from the outmost on the right side of our curve
- now that we have the right verticie selected we need to hit the “g” key and drag it to our top right pole

- ok next we need to grab the corisponding verticie on the opposite side so it would be the 2nd one in from the left!
- now we want to grab this verticie with the “g” key and drag it up to our top left pole
- so now that we have that in place we need to hit the “e” key to extrude the curve this will give you another line drag it down to the bottom pole
- do the last step again Hit “e” to extrude your curve and then drag it over to the bottom right pole
- so now we have to complete the square or complete the curve
- hit the “c” key this will auto complete your curve!!
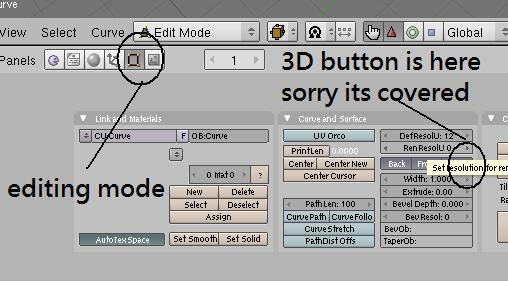
- the last thing we need to do is go into the editing tab and select the 3d option
- ok so now we need to switch back to object mode for a second and move our curve to where a rope would go around the ring. again use the g key
- when you have it where you want it you then switch back to edit mode
- ok so here is another somthing you dont have to do but if you plan to animate this ring its a good idea to do it
- to start you need to select both the two middle verticies of one section of the curve
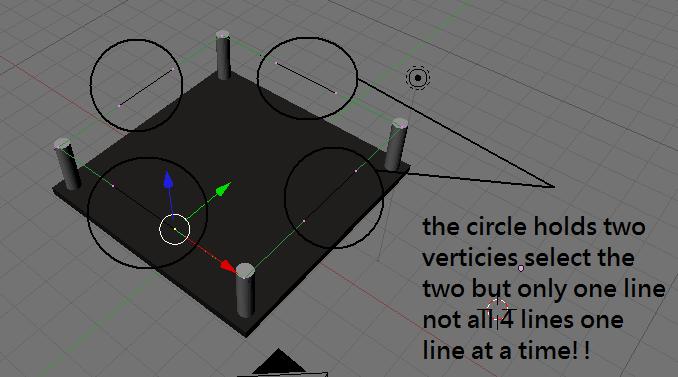
- to select both verticies of one line click on one of them and the hold shit and left click on another now you have them both selected
- next you need to hit the w key in exit mode and hit subdivide
- do this for each of the four lines!
- the point of this is to just get more play out of your line when your animating it gives you more verticies to be able to edit and get more of a rope feel!
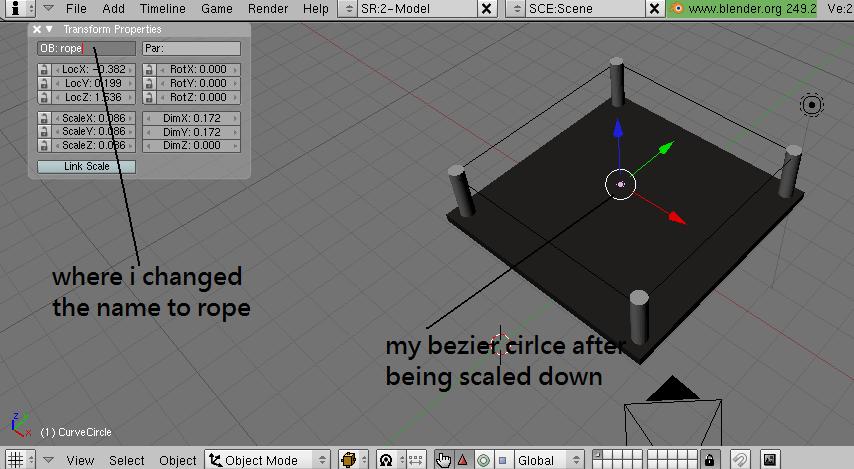
- go back to Object mode
- in object mode hit “space > add > curve > bezier cirlce” this sould pop up a circle looking object on your screen!
- where going to use this object to get the size of our rope because if you just render the curve nothing will appear
- so scale down the circle to the size you think the rope should be around your ring.
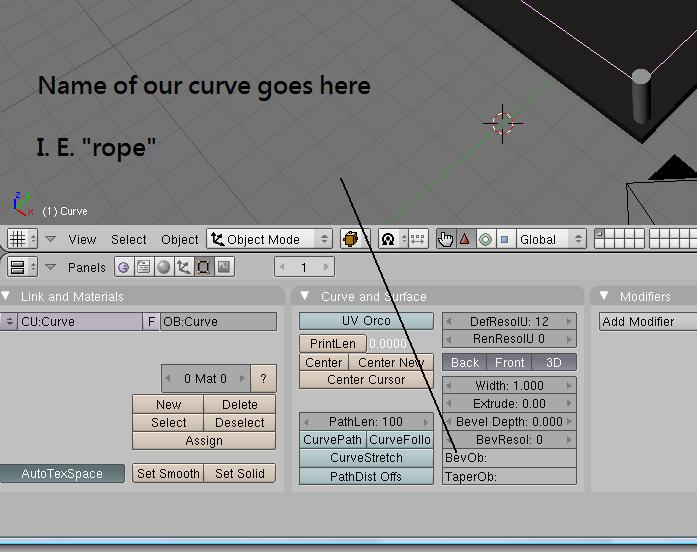
- once scaled down hit the “n” key this will bring up a menue what we want to do here is change the name of the object to somthing we can remember in my case i changed its name to rope so we will go with that for this document
- ok so now that we have that named lets click back on our bezier curve (the lines we put in between our poles)
- ok so now we need to switch to the editing button “not edit mode see picture below”

- now we need to find the section that says “BevOb” and put in the name of our bezier circle (rope)