Table of Contents
Study of Cloud Integrated Development Environments
Objectives:
- Learn what a Cloud IDE is
- Learn how to setup a Cloud IDE on a local network
Materials:
- A machine (virtual or physical) running Linux (preferably Debian 8.2)
Background:
A Cloud IDE (Integrated Development Environment) is an IDE where all projects and workspaces are stored in one central location. Even external libraries used to compile a project are stored in that central location. A Cloud IDE is useful in the fact that one's development environment is the same, regardless of what device the user is attempting to compile the project on. The project is compiled and executed in the server which the Cloud IDE is being run off of.
Getting more specific, let's say you have a home desktop and a work desktop, which is in your office. As a side hobby, you develop meme generators and other cool things in Java. Let's say your home desktop runs Java 7, but your work desktop runs Java 8, and because of a really dumb work policy, you aren't allowed to change any preinstalled programs. You begin programming on your home desktop and use GitHub to store your project's code. You go to work, and you have lunch break. You decide to start working on this project again, but something is wrong. The code won't compile on your work desktop because the Java version is too advanced. This is where something like a Cloud IDE comes in handy. The Java version will remain consistent, no matter what machine you hit that compile and run button from. Note that this example isn't as extreme (because all it would take to fix this is upgrade to Java 8 on the home desktop), but there exists more complicated instances where a Cloud IDE is the best way to go.
It's worth noting that there are many free (some restrictions may apply) Cloud IDEs available, such as:
- Codenvy
- Codeanywhere
- Cloud9
- Koding
However, some people would rather host their own Cloud IDE. This is where a program known as Eclipse Che comes into play. Eclipse Che allows anyone to host their own Cloud IDE. This project will go over setting up Eclipse Che on a Linux machine (preferably running Debian 8.2.0, for the sole reason that that is what I am running).
Procedure
The first step is to acquire a machine (virtual or physical) that is running Linux (preferably Debian 8.2.0).
Next, run the following command:
sudo apt-get install screen
This will install what is known as GNU Screen. To learn more about GNU Screen, click here.
Next, click here and choose the OS corresponding to the OS you are currently running. Follow the instructions. This will guide you through the steps towards installing Docker. To learn more about Docker, click here.
Create a new screen session with the following command:
screen -S NAME_OF_SCREEN
Inside this screen, run the following command:
sudo docker run --privileged -it -p 8080:8080 -p 49152-49162:49152-49162 codenvy/che
By default, Che will run off of port 8080. You can change that to any port you want. For example:
sudo docker run --privileged -it -p 9000:8080 -p 49152-49162:49152-49162 codenvy/che
Keep the screen session running as long as you want Che to remain online. To stop the Che server, simply perform the keystrokes “Ctrl + C”. To exit a screen session, perform the keystrokes “Ctrl + A + D”. To terminate a screen session, perform the keystrokes “Ctrl + A”. Next, type in “:quit”. Note that terminating a screen permanently destroys it and anything running in it. Closing a screen session is like minimizing a window. It is still running in the background.
Now, open a web browser and go to http://localhost:8080 (or whatever port you attached Che to) and the IDE should load.
Here is a screenshot of what Che looks like:
References
Study of Version Control
Objectives:
- Learn what version control is
- Learn how version control is useful
- Learn how to host a centralized repository with GitLab
- Learn of the free alternatives to hosting
Materials:
- A machine (physical or virtual) running Linux (preferably Debian 8.2.0)
Background
First off, what is version control? Version control is software which will track how a project changes overtime. Along with that, you can revert to a previous change (called a commit) and even create something called a branch, which is like a separate pathway for your code to follow. This way, any changes you make won't apply to the main branch.
The two main version control programs out there currently are Git and Mercurial. The difference between the two is really up to others to decide. There's not much to differentiate the two except for little details, such as syntax of commands or configuration files. If you have never heard of version control prior to reading this, than perhaps you have heard of GitHub. GitHub in itself is not version control, but rather a GUI to version control, where all the code is stored on GitHub's central servers, rather than on your own machines.
Version control can be used in a group or as an individual. Most developers use either BitBucket or GitHub. Both are free to use however, there are limits to a free account. In order to gain all privileges (such as private repositories or repository groups) you must either pay or register with a .edu email address. In fact, GitHub will give you a bunch of free stuff as a college student!
To learn version control from the command line, I would recommend going through Codecademy's Git tutorial.
Procedure
The first step it to obtain a machine (virtual or physical) running Linux (preferably Debian 8.2.0).
Note: If you are not running Debian 8, click here and select the OS you are running. Follow the instructions from that web page, rather than here.
First off, run the following command:
sudo apt-get install curl openssh-server ca-certificates postfix
Ensure that you select “Internet Site” during the setup. This command will install the necessary dependencies.
Next, run the following commands:
curl https://packages.gitlab.com/install/repositories/gitlab/gitlab-ce/script.deb.sh | sudo bash
sudo apt-get install gitlab-ce
These commands will add the GitLab package server and install the GitLab package itself.
Next, configure and start up GitLab:
sudo gitlab-ctl reconfigure
GitLab will go through the configuration process. GitLab should now be running on port 80.
Visit http://localhost:80. The administrator credentials are “root:5iveL!fe” (the colon separates the username and password).
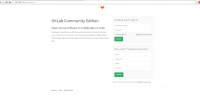
Here is a screenshot of what GitLab should look like:

