Table of Contents
Creating a Mac OS X Virtual Machine
Objective(s)
Successfully install and run a Mac OS X virtual machine in Virtual Box
Materials/Readings/Prerequisites
Virtual Box Securable Mac OS X ISO by Hazard
Background
Why would we want to install Snow Leopard inside our Windows or Linux box? Maybe we just want to try it out and we're not ready to throw down the big bucks or the means to build our own HackNtosh. Perhaps we just need to add another OS to our collection. Whatever the case, using Virtual Box is the most straight forward way to go about installing OS X. We'll walk through all the steps to successfully install and run Mac OS X inside Virtual Box.
Procedure
Before We Start
First thing's first, download and install Securable. This will check to see if you're CPU supports hardware virtualization. If it doesn't, you're dead in the water.
Once you've established that your CPU supports hardware virtualization, download and install virtual box on your machine.
Dump the Disk
Next we want to dump disk to the hard drive. Enter the following into the command line and wait for dd to finish its work. This command will take the contents of the disk and save it as osx.iso.
lab46:~/dd if=/dev/sr0 of=osx.iso
Creating the Virtual Machine
- Now that you have Virtual Box installed, open it. At the top of the window click Machine and then click new. This will open a dialogue box. Click next.
- Now we have a couple of fields to edit. The first field, name, doesn't really matter. Call it whatever you like. Under OS Type we have two fields to change, operating system and version. Set the operating system to Mac OS X and version to Mac OS X Server. Click next.
- Here we set the amount of memory we want to give to the virtual machine. A gig is find to start with but by all means use more if you have it to spare and then click next.
- Make sure boot hard disk is selected and then select create new hard disk and click next.
- At the New Virtual Disk Wizard click next.
- For the storage type select dynamically expanding storage and click next.
- Next we set the location and size. For location just type in a name like OSX and it will create the folder for you. For the size I just used 20 gigs. Use whatever you feel is appropriate and then click next and then click finish.
System Settings
- Click on your virtual machine and click settings at the top of the window and under the motherboard tab do the following.
- Set the boot order to only boot from the dvd/cd.
- Set the the chipset to ICH9
- Under extended features select enable IO APIC and enable absolute pointing device.
- Under the processor tab select enable PAE/NX.
- Under the acceleration tab select both enable VT-X/AMD-V and enable nested paging options.
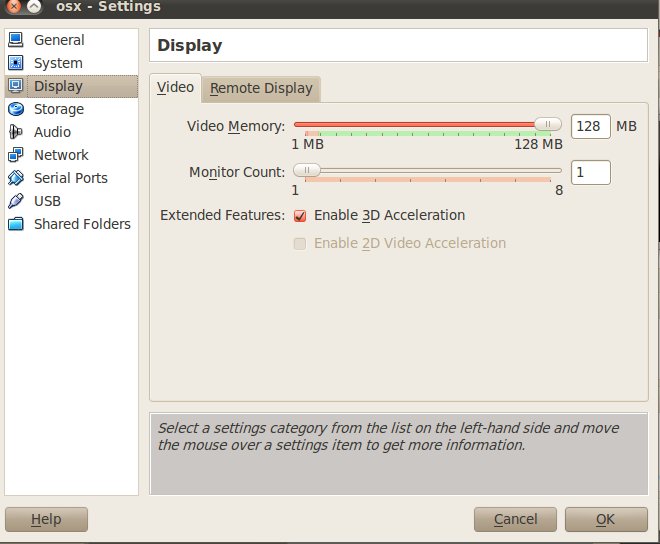
Display Settings
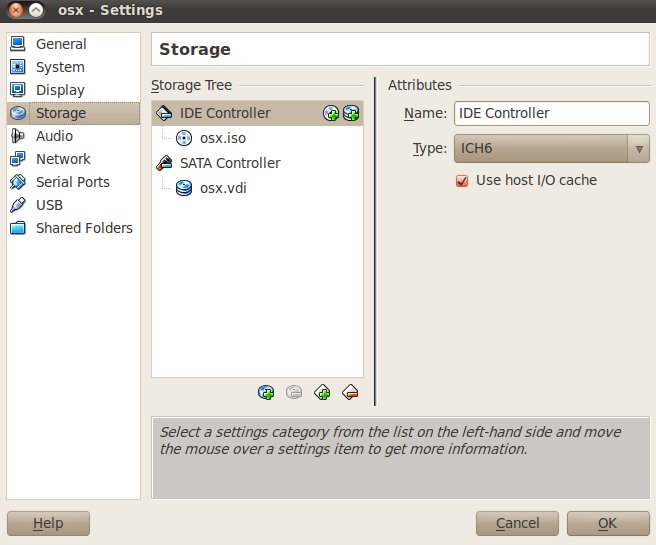
Storage Settings
- Under Storage Tree click empty and then click the disc icon under attributes then select the location of your OS X Iso. click ok
Setting Up Snow Leopard
- Click on your virtual machine and at the top click start. Now once the installer is running press f8 and then hit enter. If you don't hit enter, the screen will just sit there.
- At the prompt you can enter “-v”. If anything goes wrong, this will let you know what happened.
- First you will be prompted to select a language. You'll have to wait for a few seconds and then hit continue.
- Agree to the terms of service.
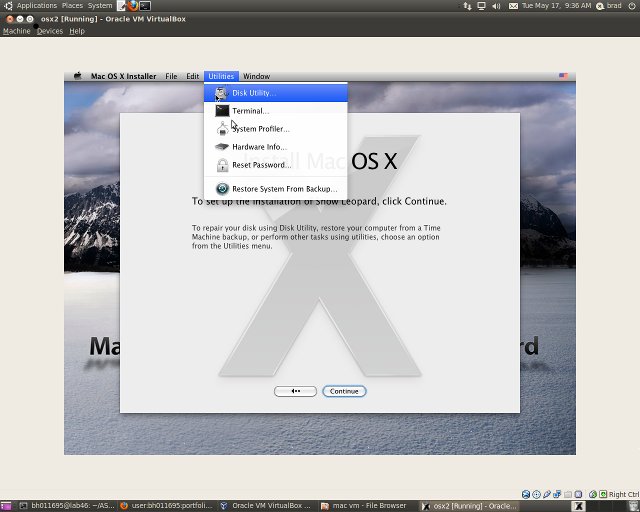
- At the top of the screen click utilities and then click disk utility.
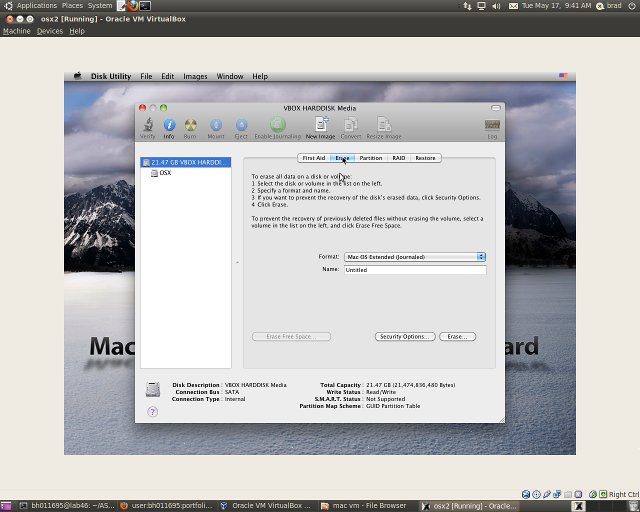
- Once the disk utility opens select the VBOX HDD.
- Click the erase tab and set it to Journaled and set the name to OS X. Erase the disk and Exit the disk utility.
- Click on the hard disk and click on customize.
- Select chameleon boot loader 4 and legacy kernel and click ok.
- Click install and play the waiting game
Finishing Touches
- After Snow Leopard is installed, go back into the VM's system options and reset the boot order to start with the HDD. As is it will just keep wanting you to reinstall Snow Leopard.
- Fire up the VM and make sure to hit enter when you see the chameleon boot loader pop up.
- Let Snow Leopard do its thing and shortly you'll see the desktop appear.
- In the finder click on Go and then click Utilities and look for the terminal.
- Once you have a terminal open login as root.
lab46$~:/ cd /Library/Preferences/SystemConfigurationlab46$~:/ vi com.apple.Boot.plist- Enter the following lines: <key>Graphics Mode</key> and <string>1280x1024x32</string> make sure you set the resolution to what's suitable for your monitor. This will have things set up so it runs full screen properly.
- Save and exit then restart the VM and all should be well in the world.


